
Houdini training day 3
To parent the position or whatever of one object to another, it’s really simple: highlight the attribute, right click Copy parameter. On the second object Paste Copied Relative References. To see the expression, click on the attribute name. It will cycle between the value and the expression. Dark green on the values means that there’s an expression beneath.
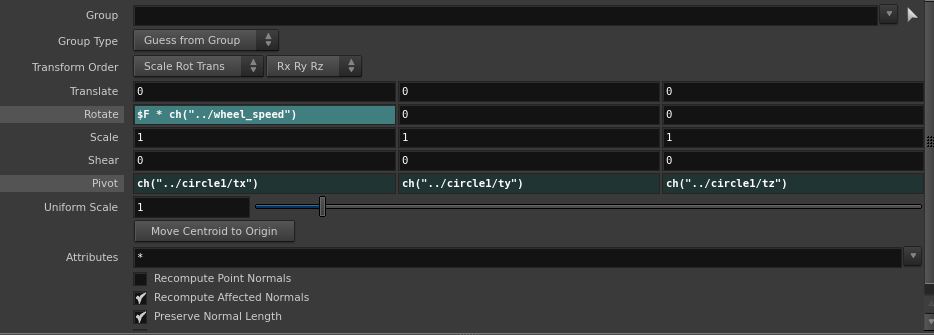
The simple expression created to parent the position of one object to another is going to be:
ch(“../circle1/tx”)
ch means channel.
tx means translate x
.. means going back one level, inside the same network, to the circle1, to the position x
you can see that tx means translate hovering the mouse on position
you can get all the parameters names just hovering the mouse with ctrl pressed.
basically the expression is saying: I need to pull a channel from a node that it’s not myself, that is called circle1 and the value is tx.
We can change the values of our expressions as well.
ch(“../circle1/tx”) + .05
If we hover the mouse on the value we added, we can use the value ladder clicking the MMB.
This is basically the same as in C4D with Set Driver and Set Driven Xpresso.
Remember: primitives are the faces!!!
$F: is like in after effects or in C4D, the frame number drives an animation.
In Houdini you can limit the framerate of the viewport to the project framerate! Nice one. Just click the little clock at the bottom, the one next to the key.
User Data of C4D is so much easier in Houdini. Just click on the gear on top of the parameter window and Edit Parameter Interface. Then you can create whatever you want with a nice menu interface.